PURPOSE: This article provides a user guide on the Pay by Link feature which is available from the Atomic Portal.
KEY INFORMATION

This guide will help you to set up Pay By Link, including the template (where you add your standardised message to customers), the email layout (how you customise the email your customers will receive), and the link itself (the one you send to customers)
TABLE OF CONTENTS
|
Introduction - Pay By Link
The Pay by Link feature (PBL) allows you to send customised payment links to your customers when they make a purchase. In other words, instead of being redirected to a checkout page, your customers will receive a link in their email inbox which will then direct them to a payment page.
NOTE
The PBL feature page only covers how to customise the email and the link that your customers will receive
To check how to customise the PBL payment page, please check the Payment Page Customisation article here.
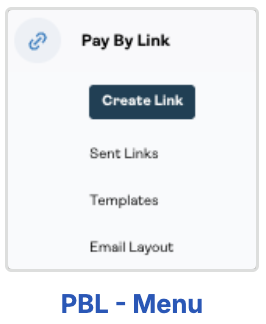
The PBL feature is accessible from the Atomic Portal - you will see the full PBL menu on the left-hand side.
NOTE
Your access to PBL depends on your set-up. If you would like to add PBL as a feature please talk to your Relationship Manager (relationshipmanagement@apexx.global) or your Implementations Manager if you are an onboarding merchant (implementations@apexx.global).
PBL Steps
PBL relies on 3 steps:
the template: this is where you will add your standardised email message that will be displayed to your customers in the email they receive.
the email layout: this is where you will be able to customise the email layout including adding your company logo and colours
the link: this is the link you will send specifically to your customers where you will enter the currency and amount etc.
If you have several merchants set-up in your merchant hierarchy (this is reliant on your set-up and configuration with APEXX), you will need to select the relevant merchant. If you have one merchant in your hierarchy, then it will be automatically selected for you as default.
1. Step 1: Creating your Email Template
NOTE
In the Template part of the PBL set-up, you will create your standardised email message that customers will see in the email that they receive. Simply put, the template allows you to use the same text in your emails without having to type it when you send a payment link to your customers. You can have as many templates as you want, as per your business requirements, there is no limit to the number you can create.
In the email template, you will not be able to customise the layout yet - this is done in the Email layout step.
1.1. Existing templates
If you have previously created any templates, they will be visible in the Templates section and categorised with 3 statuses: active, inactive or draft.
NOTE: Only the active ones can be used to send emails externally to your customers.
There is a toggle on each template that allows you to take certain actions on the template depending on the status:
draft: toggling on will change the status from Draft to Active
active: toggling off will change the status from Active to Inactive
inactive: toggling on will change the status from Inactive to Active
There is a confirmation page before the change is made.

Modifying or cloning a template
You will only be able to make changes to your template when they are in the draft status. No changes are permitted when the template is active.
To modify a template, click on the 3 dots on the right-hand side of your template and click on Edit.
You can clone a template regardless of the status it is in (i.e. active templates can be cloned).
1.2. Adding a new template
To add a new template, click on Add Template at the bottom right-hand side corner of the page to create a new template.
NOTE
If you have several merchants set-up, the merchant you select at this stage will be the one you create the template for - templates are specific to the merchant, meaning that if you have several merchants in your organisation, you will not be able to use the templates interchangeably.
Valid from : date from which the template is valid. It cannot be a date in the past.

Valid to: you can add an expiry date to the template. Leave blank if you want your template

Template name: as you will be using this template at a later stage, it is advised to provide an informative name for your template so you know what the template is meant for.

Email subject: this is the subject line your customers will see in their inbox when the email is sent to them

Sample text: there is already a text by default that you can customise and change.

Valid from : date from which the template is valid. It cannot be a date in the past. Valid to: you can add an expiry date to the template. Leave blank if you want your template Template name: as you will be using this template at a later stage, it is advised to provide an informative name for your template so you know what the template is meant for. Email subject: this is the subject line your customers will see in their inbox when the email is sent to them Sample text: there is already a text by default that you can customise and change.
In the Sample text, there is only one mandatory field: the Customer name. It is already added by default and you do not need to change it. All your changes will be reflected on the right-hand side.

Once you click on Add Template, you will see the below window to customise your the layout of your template now or later.
2. Step 2: Customising your Email Layout
In the previous step - Template - you have created the standardised email message to be sent to your customers. In the following step - Email Layout - you will customise the email that is sent to your customers. Click on Email Layout to get started in the PBL right-hand side menu and select the merchant.
NOTE
The email layout applies to ALL the templates you have created for the merchant you selected. The template dropdown (see below) allows you to select the template you have created in Step 1 for preview purposes, to allow you to gauge the look and feel, but the layout will apply to all the templates you have created.

Template: select the template you have created in Step 1 to gauge the look and feel

Header Title: this can be your company name for example

Header Colour: you can either choose a colour or add your company’s hex colours in

Company logo: add your company logo. Hover over the black “i” icon to view size specificity (250x141 pixels max)

Button title: this is what will be written on the pay button

Button colour: the colour of the Pay button

Title: the colour of your button title - be mindful of the colours used at this stage, the text must be visible

Background picture: you can leave it toggled off to remove any background or toggle it on to add a one. You can either upload your own background or choose one of the 4 default options.

Show expiry date: by default it is toggled on, but you can toggle it off. This shows when the payment link expires.

Click on Publish changes at the bottom of the page when you are satisfied. The email layout will apply to all your templates.
Once you have created your email layout, you can move on to creating your link.
3. Step 3: Creating the link
You have now created your template with the standardised text that you want to send your customers (step 1) and have customised the email layout (step 2). All that is left is creating the link to send to your customersNOTE
If you want to customise your payment page (checkout), head to the Payment Page Customisation section of the Portal where you will be able to create a payment page for your PBL templates. If you have not created one yet, a default payment page will be sent to your customers but will not have any of your colours, logo, etc. For more information on Payment Page Customisation click here.

Email Template: You can only use Active templates to create the link - templates in Draft or Inactive will not appear in the drop-down.

Payment Template: if you have created a template via the Payment Page Customisation, select it from the dropdown (see above)

Customer First Name / Last Name: The first and last name of the customer you are sending the link to

Expiry date: the expiry date of the payment link. The changes will be reflected on the email message on the right-hand side if you have left the Show Expiry Date toggled on in the previous step

Merchant reference: add a unique reference for your purchase or tick the box to generate a random one.

Upload invoice: if you use invoices or your customer has requested one you can load it here.

Amount: you need to add the currency before you enter the amount
Your customer will receive the email customised as per your Layout customisation. Once they click on the pay button, they will be redirected to the payment page that you would have created and customised previously.
In the Payment page customisation, PayPal and iDeal were selected besides card, and the customer can choose their preferred payment method and follow the necessary steps.

4. Sent Links
In the Sent Links section, you can view all of the links that you have sent to your customers, and their associated status.
You can filter the page by status (e.g. Pending, Failed, Success etc.) and / or date by using the date picker at the top of the page. If you have several merchants set-up, you can select one or multiple merchants to have an overview of all links sent across your organisation.
Statuses
Success: the customer has clicked on the link and completed the transaction successfully
Failed: the customer has clicked on the link but the transaction has failed
Pending: the link has been sent to the customer but the payment has not been completed - no transaction has happened yet
Expired: the payment link has expired - no transaction has happened. A new link needs to be resent
Cancelled : the customer has clicked on the payment link but has cancelled the transaction
Declined: the customer has clicked on the payment link but the transaction was declined
There are some actions that you can take on a link, depending on its status. To do so, click on the 3 dots at the end of each row to view the available options. For example, for a Pending link, you will be able to expire it, resend it, or clone it.
For Declined, Failed, and Successful transactions, you will be able to see a blue “transaction” status - clicking on it allows you to open the transaction and view details. Alternatively you can click on the 3 dots and click on “Linked Transaction” to view the linked transaction.
NOTE
There can be more than one linked transaction in specific instances, for example in the case of a decline or a failure, the customer may try again, leading to a successful transaction. In this case you would see several linked transactions. The merchant reference would in that case remain the same - as it is the reference from the payment link, however each APEXX transaction ID would be unique.
